All active subscriptions include access to premium support. To receive the fastest response from our team, please follow these steps before submitting your support ticket.
Determine Which Plugin or Theme is Causing Your Issue
We work hard to make our plugins broadly compatible, however, it’s impossible for us to test every plugin, theme, and server environment out there. Most problems that arise with WordPress plugins (like The Events Calendar) are conflicts–errors that occur when code from one plugin or theme conflicts with another plugin or theme.
Testing for Conflicts
Testing for conflicts allows you to quickly identify the cause of the problem. You can run your tests on a staging site (best choice), or if that is not possible, consider using the troubleshooting mode of plugins such as Plugin Detective and/or Health Check.
Getting Ready
Before you start troubleshooting, there are a few best practices you’ll want to follow:
- If you don’t have one already, create a staging site for testing
- Make a backup of your site (we can’t recommend this enough!)
- Make sure your plugins are up-to-date and you’re running the latest versions
Step One
Switch to the Twenty Twenty theme. This will give you a clean slate to start with.
From your site’s WP Admin area, click Appearance > Themes on the left-hand menu. You will see the themes available on your site. Move your cursor over the “Twenty Sixteen” theme, and click “Activate”.
Step Two
Disable all plugins besides the ones you are testing. In the left-column menu of WP Admin, click Plugins > Installed Plugins. You will now see all the plugins you have installed. Click the checkbox next to all of them except The Events Calendar, Event Tickets, and any add-ons like Events Calendar PRO or Community Events. Please also deactivate any of our extensions you might have. From the Bulk Actions drop-down menu, select “Deactivate” and then click “Apply”.
Step Three
Clear your browser cache and retest. Once you have followed the steps for clearing your browser cache, go into your site and try to recreate the problem you originally noticed. If it is now fixed, that means there was a conflict. The next step is to find the source of that conflict.
Finding the Source of a Problem
Once you’ve identified that there is indeed a conflict, use our step-by-step guide to find the source of the problem. If you tested for conflicts and did not find one (aka the problem still persisted when other themes and plugins were deactivated), head on over to our Help Desk.
Reporting a Problem
Free Users
If you’ve found a bug in one of our free plugins and you are not a premium customer, please head over to the free WordPress.org forums to report it.
Paid Customers
Paid subscribers have access to premium support, so submitting a Help Desk ticket is the route to go. So we may assist you as quickly as possible, please provide the following information in your ticket:
- State that you have found a conflict, and give the name of the conflicting plugin/theme along with its version number.
- Describe in detail the problem that happens when you are running that plugin/theme with a given Tribe plugin. Sharing the URL of the website (and specific page) with the issue; screenshots and/or screen recordings of the issue can be extremely helpful as well.
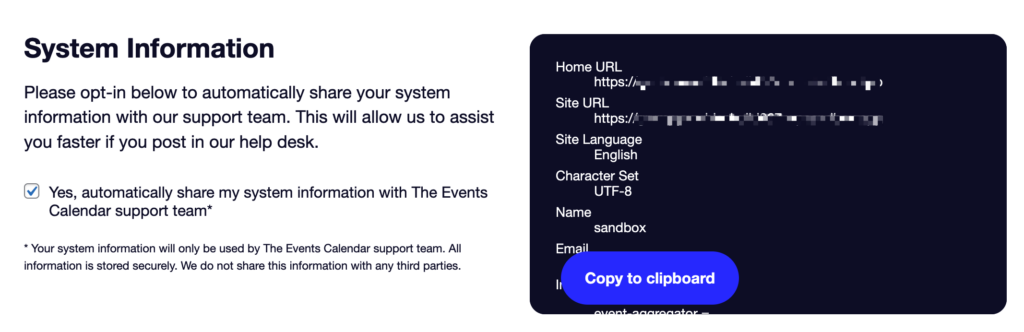
- Share a copy of your System Information with us by going to Events > Troubleshooting and checking the box under System Information (see screenshot below).
- Enable WP_DEBUG, replicate the problem, and then send us the resulting debug log.
Note: Existing customers should log in before submitting a new ticket. That will allow us to connect you with the right team members a whole lot faster. If you’re not sure which credentials to use or have any difficulties logging in, we’ve got a handy guide to help you out.
Providing a database dump
Sometimes the best way for us to troubleshoot a particularly tough issue is to get a copy of your site’s database. We can then set up a private copy of the site to dig into.
❗A database dump contains user information and other sensitive data and should ONLY be shared through our private support portal. Never share a database via the WordPress.org support forums.
Follow the steps below to create and share your site database:
- Install and activate the free plugin WP Migrate Lite.
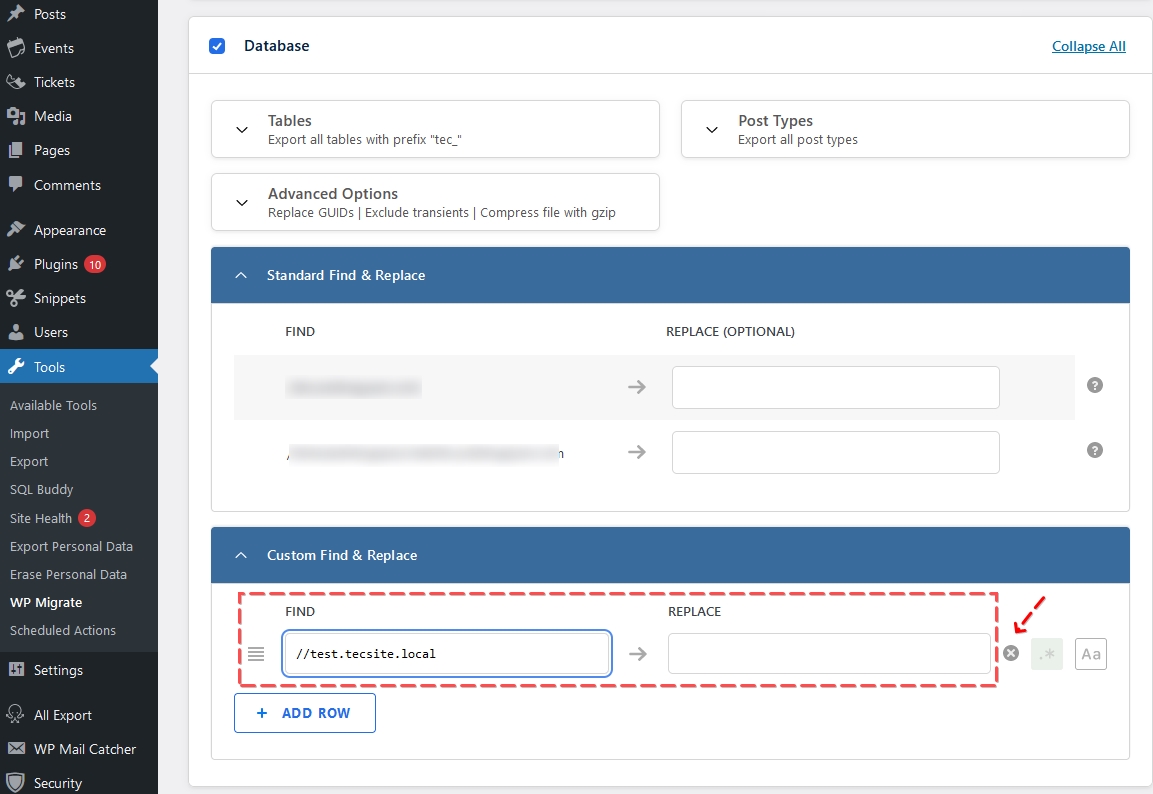
- In your dashboard, go to Tools > WP Migrate.
- Click the blue New Migration button.
- Click the Export button.
- Under Custom Find & Replace, remove any of the rows with text by clicking the x (like this).
- Scroll down and click on the blue Export button.
- Share the generated file with us through your support ticket. If it’s too large to attach, you can upload it with a tool like Droplr or Google Drive.
Be sure you also share your System Information so that we have a list of your site’s active plugins.